Zero Downtime Domain Transfer: A Simple Guide for Beginners to Transferring Domains and Nameservers Without Losing Website Traffic
For website owners, e-commerce entrepreneurs, and digital publishers, the thought of transferring a custom domain name (e.g., yourbrand.com) from one domain registrar to another is often met with significant technical anxiety. The fear is understandable: a botched domain transfer can take your corporate website offline, display broken page errors to customers, disrupt business email communications, and cause a sudden drop in your Google search engine rankings. If prospective customers visit your site during a mismanaged transfer and encounter a blank screen or connection error, you lose revenue, brand trust, and customer confidence.
However, transferring a domain name does not have to result in website downtime or technical headaches. In fact, when executed using a proper technical protocol, a Zero Downtime Domain Transfer ensures that your website remains 100% online, your corporate emails continue sending and receiving messages without interruption, and Google bot continues crawling your pages smoothly throughout the entire transfer window. The key to a zero-downtime domain transfer lies in understanding the critical distinction between transferring Domain Name Registration (ownership records governed by ICANN) versus updating DNS Nameservers (where your website files and mail servers live). In this comprehensive beginner’s guide, we break down the step-by-step procedure to execute a flawless, zero-downtime domain transfer—from pre-transfer preparation and EPP authorization codes to DNS propagation management and post-transfer security locking.
David, an e-commerce store owner, needed to transfer his domain name away from an old legacy registrar that was charging $28 per year for basic .com renewals. However, because his online store generated over $1,500 in daily sales, David hesitated for months out of fear that a transfer glitch would take his checkout page offline during the 5-day transfer window. After consulting a web developer who walked him through the zero-downtime transfer protocol, David set up his DNS records on a third-party Cloudflare panel first. He then unlocked his domain and initiated the EPP transfer code. His online store remained 100% online, processing customer transactions continuously throughout the 5-day transfer process without missing a single order. David reflects: "Understanding that DNS management operates separately from domain registrar transfers took away all my fear. We moved our domain safely with zero downtime and saved money on annual renewal fees."
Transferring a custom domain name from one registrar to another often brings unnecessary technical anxiety for website owners who fear sudden downtime, broken pages, or disrupted email communications. However, when you separate domain ownership registration from your DNS nameserver routing, you can move your digital assets safely without missing a single visitor or transaction. In this comprehensive beginner's guide, we walk you through a foolproof, step-by-step zero-downtime domain transfer protocol—covering EPP authorization codes, DNS record backups, TTL adjustments, and post-transfer security hardening to keep your website 100% online.
1. The Technical Difference: Domain Registration vs. DNS Nameservers
To execute a zero-downtime transfer, you must understand the two separate layers governing your domain name:
Decoupling Ownership from Web Traffic:
- Domain Registrar (Ownership Level): The ICANN-accredited company (e.g., Cloud flare, Name cheap, GoDaddy) where you pay your annual domain renewal fee and manage official contact details. Transferring your domain registration simply shifts who sends you the annual renewal bill.
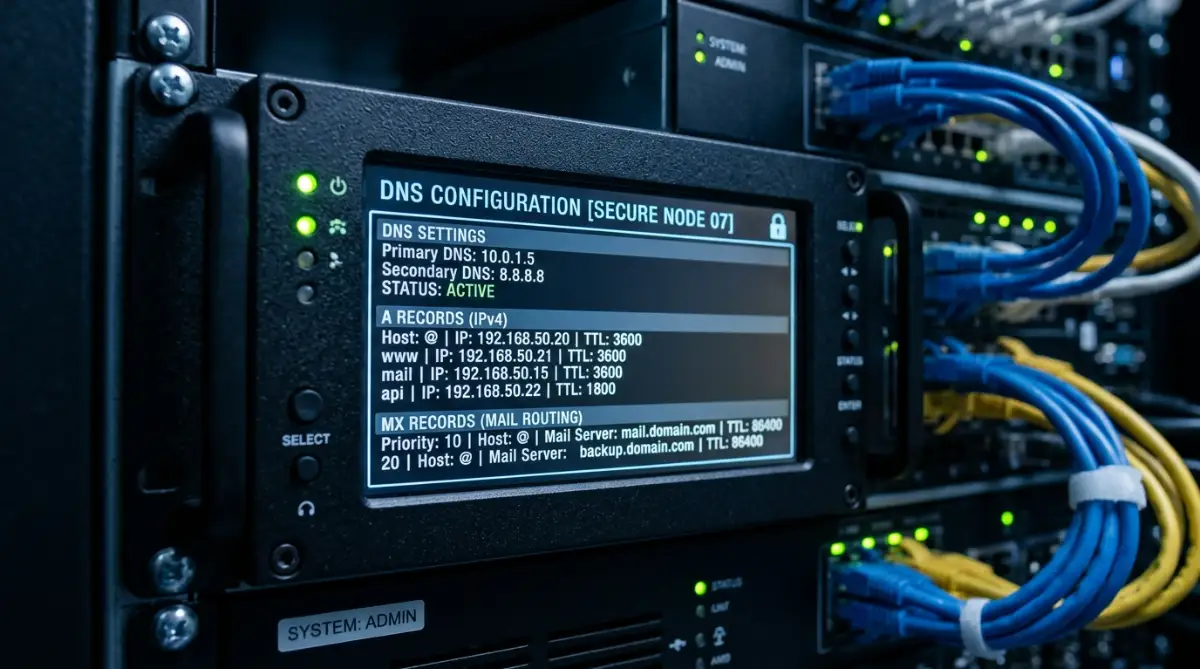
- DNS Nameservers (Traffic & Routing Level): The specialized servers (e.g., ns1.hostingprovider.com) that translate your domain URL into physical IP addresses for web servers (A Records) and mail servers (MX Records).
- The Zero Downtime Golden Rule: As long as your DNS Nameservers remain active and pointing to your web host, you can transfer your domain registration between registrars for days without a single millisecond of website downtime!
To analyze broader small business software economics and digital asset management strategies, explore our comprehensive analysis of small business software economics and digital asset management.
My Personal Pro Tip (By Md Jahangir Alam): Whenever I transfer a client's domain name, I always keep their existing DNS nameservers active and locked onto a reliable external provider like Cloud flare for at least 48 hours before unlocking the registrar lock. This completely insulates your web server routing from registrar-side transfer delays and guarantees zero downtime!
Watch this expert video demonstration showing real-world registrar dashboards, unlocking domains, generating EPP authorization codes, entering transfer secrets, and managing DNS settings:
2. Pre-Transfer Protocol: Essential Safeguards Before Initiating
Before requesting a domain transfer authorization code from your current (losing) registrar, verify that your domain meets these essential ICANN compliance requirements:
Elena, a freelance web designer managing a domain transfer for a local law firm, knew that email downtime was unacceptable for her client. Before requesting the domain transfer code, Elena created a complete written backup of the firm's complex MX email routing records, SPF verification tags, and Demarco security TXT records. Because she verified that the domain's DNS nameservers were pointed to a stable third-party DNS provider prior to unlocking the domain, the law firm's corporate email inbox sent and received client messages without a single lost email during the entire transfer process. Elena shares: "Backing up your MX and TXT email records before touching domain settings is the single most important habit that protects your business communications."

3. Step-by-Step Guide to Executing a Zero-Downtime Transfer
Follow this chronological 6-step roadmap to move your domain name safely between registrars:
- Step 1: Point DNS to a Third-Party or Hosting DNS Panel: Ensure your domain's nameservers are pointed directly to your active web host or a free third-party DNS manager like Cloud flare. Verify all A, CNAME, MX, and TXT records are active.
- Step 2: Lower DNS TTL (Time to Live) Settings: Log into your active DNS panel and lower the TTL setting on your A and MX records to 300 seconds (5 minutes). This ensures any future IP changes propagate across the global internet in minutes rather than days.
- Step 3: Unlock the Domain at Current Registrar: Log into your losing registrar account, locate the domain security settings, and toggle off the "Domain Transfer Lock" (Client transfer prohibited flag).
- Step 4: Request the EPP Authorization Code: Request the EPP Code (also known as an Auth-Code, Authorization Key, or Transfer Secret) from your current registrar. This alphanumeric password proves you are the authorized owner.
- Step 5: Initiate Transfer at the Gaining Registrar: Log into your new (gaining) registrar account (e.g., Cloud flare, Name cheap, or Pork bun). Select "Transfer Domain," enter your domain name, paste the EPP Authorization Code, and pay the 1-year domain renewal transfer fee (ICANN adds 1 extra year to your expiration date automatically).
- Step 6: Approve the Transfer Confirmation Email: Open your Who is administrative email inbox and click the transfer approval link sent by your current registrar to expedite transfer approval (reducing transfer time from 5 days to 15 minutes in many cases).
To discover strategies for sourcing small business grants and founder funding, read our guide on proven strategies for sourcing small business grants and founder funding.
4. Post-Transfer Hardening & Security Locking Protocols
Once your domain transfer completes successfully and appears inside your new registrar dashboard, complete these four mandatory security hardening steps:
- Re-Enable Registrar Domain Transfer Lock: Turn the Domain Lock toggle back ON immediately to prevent unauthorized transfer attempts by malicious actors.
- Enable Free Lifetime Who is Privacy Shield: Confirm that Who is Privacy Protection is active, masking your personal home address, phone number, and personal email from public search engines and spammers.
- Enforce Two-Factor Authentication (2FA): Secure your new domain registrar login account using an authenticator app (like Google Authenticator or 1Password) or a hardware security key (YubiKey).
- Enable Auto-Renewal with Secondary Backup Payment Methods: Configure 1-click auto-renew and add a secondary backup credit card to prevent accidental domain expiration drops.
Learn how to optimize financial workflow automation and business banking operations in our essential guide to financial workflow automation and business banking management.
If you are exploring career opportunities in remote small business operations or system administration, review our guide to the best high-paying remote roles and small business operations careers.
Marcus, an online consultant, completed his domain transfer to a high-security registrar. The moment the transfer completed, he audited his account security settings: he turned on transfer locking, enabled free Who is privacy shielding, and bound his account login to a hardware YubiKey security key. Two months later, an automated phishing email attempted to trick Marcus into logging into a fake registrar page. Because his real account required a physical hardware key, the hackers were completely blocked from accessing his domain assets. Marcus reflects: "Transferring a domain is the perfect time to audit your digital security. Securing your domain with hardware 2FA guarantees peace of mind for years."
5. The Master 7-Step Zero Downtime Transfer Checklist
Ensure your domain move executes without a single hitch using this master checklist:
- Step 1: Confirm Domain Age Exceeds 60 Days: Verify the domain wasn't registered or moved in the past 60 days.
- Step 2: Maintain Active DNS on Current Host: Ensure website files and email MX records stay active on your current web host.
- Step 3: Export & Copy All DNS Records: Save a complete copy of A, CNAME, MX, and TXT records to a notepad file.
- Step 4: Lower DNS TTL Values to 300 Seconds: Lower TTL settings 24 hours prior to starting the transfer.
- Step 5: Unlock Domain & Obtain EPP Code: Disable domain transfer lock and copy your EPP authorization code.
- Step 6: Submit EPP Code at New Registrar: Initiate transfer at the gaining registrar and complete payment.
- Step 7: Confirm EPP Approval Email & Re-Lock Domain: Click the administrative approval email, verify Who is privacy, and re-enable transfer locking.
6. Final Summary & Path Forward
Transferring a domain name does not have to be a stressful or risky technical endeavor. By separating your DNS management from your domain registration, verifying Who is email access, backing up DNS records, and utilizing EPP authorization codes, you execute a seamless zero-downtime transfer that keeps your website online and your emails flowing.
As I reflect on how many website owners fear moving their domains to cheaper registrars, I always remind them that proper planning eliminates all risk. Take control of your domain portfolio today by auditing your renewal pricing, selecting a secure ICANN registrar, following these zero-downtime preparation steps, and stepping confidently into a secure, fast, and cost-effective digital future!
Frequently Asked Questions
What is a zero-downtime domain transfer?
A zero-downtime domain transfer is a transfer process where domain ownership moves to a new registrar while your website and email routing remain active and uninterrupted by keeping DNS nameservers stable.
Will my website go offline during a domain registrar transfer?
No, as long as your DNS nameservers are configured correctly and remain active on your web host or third-party DNS provider, your website will stay online throughout the transfer window.
What is an EPP authorization code?
An EPP code (also known as a transfer secret or auth-code) is a unique alphanumeric password provided by your current registrar to prove you are the authorized owner permitted to move the domain.
Why do I have to wait 60 days to transfer a new domain?
ICANN regulations enforce a mandatory 60-day transfer lock on newly registered domains or domains that have been recently transferred to prevent domain theft and fraud.
How long does a standard domain transfer take?
Standard domain transfers take between 1 to 5 days, but you can usually approve the transfer instantly via email confirmation to complete the process in minutes.
Disclaimer
The information provided in this article is for educational, informational, and general technical guidance only and does not constitute formal software endorsement, IT engineering, or legal advice. Domain transfer rules, ICANN 60-day locks, EPP authorization requirements, WHOIS privacy policies, and registrar renewal prices are subject to change by domain registries and registrars over time. Website owners are strongly encouraged to review vendor terms of service and consult with a qualified system administrator before initiating domain transfers.